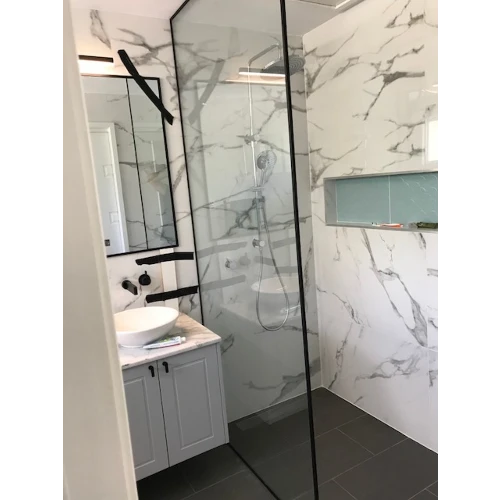
Frameless shower screens in Sydney
Dive into this articleShower screens in Sydney’s inner west and frameless shower screens in Western Sydney are gaining fast popularity because of their elegance and several benefits.
At Showerland, we provide you with the best shower screens in Sydney. You can consult us for your frameless shower screen installation in Sydney, pre-fabricated and assembled framed screens, or any other type of shower screen in Australia.
LEARN MORE ABOUT THE FIXED PANEL WITH A BLACK FRAME
You can design your Fixed panel 10mm thick toughened safety glass with a U Channel that surrounds it and choose the colour of that U channel from the different colours found at Choose your U-Channel colour here. The width and height of that side panel can be customised and cut to your preferred size; however, if you choose the default height of 2000mm, you will save both time and money.
Another thing you may consider is the time frame that is needed to cut that panel, polish its edges, and toughened it. Again, you can avoid this process if you choose the default height instead. If you decide to cut the panel to a different size, you need to consider waiting for an extra 5 to 7 business working days to manufacture that panel.
Learn about the standard Fixed Panel
You can design your Fix panel 10mm toughened safety glass and cut it according to your wall and floor slopes. You can also choose which colour bracket you want to use, from chrome finish to matt black, and we can customize the width and height of that panel, but as stated before in the previous paragraph, you can save both time and money by using the default 2000mm height.

The glass panel with floor brackets is a great option to consider
You can install floor brackets if you have a panel width of more than 1100mm by 2000mm, and we do not recommend fitting them to avoid any damage to the waterproofing area. The only place we can fix them is on a ground floor area only.
The support bar is an alternative way to support that panel from moving, and you can also choose the colour of that bar from the different options for support bar colours.

Choose the wall to wall 10mm toughened glass door in the middle.
We can design your wall to wall shower door so that the door opens from the centre, and we can divide the length between the two partitions into two symmetrical fixed panels with the door in between. We can also design the door to open inside and outside without touching the vanity or the toilet by adjusting the fixed panel accordingly, and we advise you to choose a wall-to-wall adjustable shower screen because you will be able to control the widths and heights at your comfort.

Door with fixed panel aligned : Our recommended option.
If you have a sidewall and you need a wall to wall screen that will flush with the end of those walls, making it look like one box with a door, we can cut the glass panel according to the two walls and make the shower fit perfectly inside the three walls to give that stunning look.

Opt for the sliding door with chrome parts
We used sliding doors shower in bathrooms where it is impossible to design a pivot door because usually, we install them in shower areas where the door cannot be more than 500mm giving us no choice except for the sliding option.
However, the sliding parts are costly, and the price of panels will increase since we have to customise the whole shower and holes needed to be created inside the glass panels so the sliding parts can fit in. The time to install this shower will also double since assembling the pieces, cutting the bar, and inserting the glass panel will take the installer more time to finish.

Beware the blockage of the vanity in the doorway
Sometimes we face a challenge while installing a wall to wall screen in a tight bathroom because the vanity blocks the way for the shower to open smoothly. In this case, we design the fixed panel more extensively than the vanity by 20 mm and leave the rest of the distance for the door because by doing so, the door will swing 90 degrees inward and outward without touching the vanity at all.
Although this approach is safer than designing the door with the default size, it is possible to hit the ceramic, and this will cause the glass panel to shatter, even with a minor small hit to its side. For this approach to work, you need to measure from the wall to the end of the vanity and add 30 mm, subtract that from the total width between the border wall, and check if the remaining measure is enough for you to design a pivot door.
For example, if the total width between the walls is 1200 mm, suppose the vanity depth is 600 mm and add 30 mm will be 630mm, and then, deducting from 1200mm - 600mm = 6,00 mm is a default door for the entrance.

Another scenario now with the cabinet in the doorway
The same scenario happens with the blocking cabinet; In the cabinet example, check the curve of the assembly and the handles that exist beyond the cabinet, and with the help of the laser device, we can check the exact measure to them both and design the shower that complies with Australian standards.

Learn about the window on the wall
We sometimes face a timber obstacle where the window lay on the fixed panel side, and in that case, we have to cut the timber if its thickness is more than a few millimetres so the glass can fit in, or you can trim it to make it work on top of it.

Consider opening the screen inward and under the showerhead
It is nice sometimes to open the screen inward since the hinges swing 180 degrees, but the showerhead sometimes blocks the door from opening inside so we can create the door to open under the showerhead and make it easy to open the shower in both directions.

The Standard Corner shape frameless glass shower screen
The corner shape frameless glass shower screen is the standard type and is called an L-Shape shower or Cubical shower, and you can fit this shower screen in your bathroom. We can cut the fixed panel to the shape of the walls and floor slopes, and we can also create the door on either side, depending on the showerhead.
We prefer to generate the return panel opposite the door facing the showerhead to prevent leaking between the 5 mm gaps, but sometimes we are forced to create a shower door where the toilet or cabinet blocks the way to face the showerhead. In that case, we have no other choice, and we can use some plastic PVC U channels to prevent the gaps between the door and the fixed panel.

Corner shape frameless glass shower screen with one side over the bathtub
Sometimes you want to install a frameless corner shower next to a bathtub like the above photo, so we use the laser to ensure that the panel above the bath aligns with the one sitting on the floor.
This measure is not straightforward because the height of the floor next to the side of the door and the size of the bath top differ, especially when the storey and the bath top are not perfectly horizontal. However, we take our time measuring these types of showers, and we work by millimetres to provide the best-aligned finish possible to our client satisfaction.

Corner shape frameless glass shower screen with One side half wall
If the wall from one side of the shower is not straight and a small fence is there, we can design the corner shower to flush that small wall on the right of the photo above so that the screen will look high quality and more elegant than a fully framed shower screen.

Learn how to replace a broken return panel
If one glass panel shatters and you need to replace it, and you prefer not to buy a whole new screen, we can measure the space left there and design the new panel that will fit the floor and wall slopes and be aligned again with the old shower screen installed.

The corner shape frameless glass shower screen with matt black fittings
The Matt black Bunnings frameless shower screens are one of the most elegant shower screens, especially if your bathroom taps and parts are also in matt black colours, but matt black parts are twice more expensive as the chrome finish.

Do not forget the sliding door with matt black parts.
The sliding part with black matt colour is even more expensive than the chrome finish, making this shower one of the most costly shower screens in the market today.

Must Watch Video before buying a ready screen.
This one minute video will detail what you should consider before buying a new frameless door and how to avoid losing your money on a screen that you cannot install.
Step by step to follow while installing the frameless shower screen
- Always start with the fixed panel by adding the brackets, then lay it against the wall where you want to install the shower and on top of the 3 mm precise silicon packers. To determine the place of your fix panel, you need to measure the return panel first and make sure that the location of the fixed panel is 10 mm shorter than the return to be installed inside the return panel and not to the outer part of it.
- Use the laser to level the panel against the wall, then mark the holes inside the brackets where you need to drill and remove the fixed panel now and prepare the marked spots.
- Enter the green plugs inside the holes, and use your hammer gently to enter them without cracking the tiles, then bring the fixed panel back to its place and screw in the two brackets to the wall, and you should add some silicon to the back of your metal brackets in this part.
- Add the hinges to the fixed panel and move them up as much as you can, then use your Allen key to tighten the hinges to the glass.
- For the door installation: Use the glass suckers to hold the door and, with the help of your assistant, glide the door between the hinges but be careful to add a corner protector to the fixed panel to avoid glass shattering. After you slide the door in place, use the Allen key to tighten the door properly.
- Use the laser to make sure that you levelled the door and aligned it with the fixed panel, and remember that you can adjust the door level by loosening the screw a bit on the side of the fixed panel. Be always cautious and add a packer under the hinge to avoid the door dropping and blowing once it touches the fixed panel.
- After you adjust, you will be ready to move to the next step of installing the return panel. Try not to follow the level or laser while installing the return panel, but add silicone packers to the corner of the door and incline the board to be aligned with the door allowing 3 mm gaps between them.
- After checking that the return panel is in place and everything looks perfect for marking the hole of the brackets on the wall where you want to drill, use the green plugs to fill those holes, and be careful while using the hammer not to crack the tiles. Screw the stews carefully to the wall and always loosen the bracket while you are doing so to avoid breaking the glass panel.
- Always use a clear silicon product like the CRL silicon and apply silicone to the inside and outside parts of your shower, then use soap and water to remove the excess silicon with a scriber and leave your shower screen for 24 hours before using it to allow the silicon to dry.
ACCESSORIES: needed to install a frameless shower screen
Glass Shelves
You can add some extra shelves to your shower screen, and they come with different designs such as round, rectangular or oval shapes and are usually 8 mm thick. You can check some models using the CRL shelves link.
These shelves usually come with two brackets to install on your wall. Always try to drill between the tiles to make it easy for you to close those gaps if you want to remove them in the future.
Water stopper bar
You can choose between two types of water stopper bars, with the first having a round top like a U-shape with a height of 5 mm, and the second having a higher top of 10 mm.
Towel Bars and Grab Bars
Once you decide to use a handle on your door, you need to be aware that the price of your shower screen will rise since the door needs to come customised to that handle you chose, and you have many types of handles that you can choose from that you can find them. Just give us the code that you chose, and we can design the glass for you accordingly.
Doors Knob
You have twenty-seven types of knobs that you can use and that we provide you with below.
Brackets and Clips
You can choose between the varieties of metal brackets from 90 degrees to U shape brackets that usually hold the glass, mount it to the wall and provide a secure way to install your shower screen to the tiled wall with the 90 degrees leg that provides extra strength to the glass panel.
Hinges
You can choose between a wide varieties of hinges of high quality that come with a three-year supplier warranty. You also have many shapes and maximum weight that each hinge can carry and a maximal door length.
We can help you choose the best hinge by designing the shower screen that will fit your bathroom so, select the hinges after calculating the door weight and length. You do that to know what type of hinge to choose for that door, and you have many designs that you can also choose.
Warranty
The manufacturers provide a three-year Warranty subject to terms and conditions found on their website, and we try to use the best quality available in the market for our clients because we want them to be always satisfied and buying the best available product in the market.
Glass Certificates
All our glass comes with a glass certificate from our suppliers that comply with Australian standard products.
Glass coat
Glass panels consist of microscopic holes where the dust, soap, and water can stick to the glass. This coat will fill those holes, make your glass like a shield against dust and soap, and that means only one thing for you, which is less time to clean your glass. Oil and water will repel from the glass panels, and you will save a lot of time cleaning your glass. Vitroglaze comes with a five years warranty from the manufacturer.
People also ask
A frameless shower screen costs between AUD 990 and AUD 2,200, depending on the type of glass, its dimensions and shape.
Standard shower glass is less expensive than a custom-made shower panel, and a frameless screen with a length of more than 2000 mm will cost more. You will have to cut the glass if your shower wall and floor are sloped, which will also cost you more.
Frameless shower screens come manufactured with 10 mm toughened safety glass that complies with Australian Standards, are sturdy, durable, and of high quality. Frameless shower screens are suitable for any bathroom and give your space a spa-like feel with the luxury and elegance they add to your bathroom. We recommend you install a frameless shower screen instead of a semi-framed or framed screen.
A frameless shower screen costs between AUD 990 and AUD 2,200, depending on the type of glass, its dimensions and shape.
Standard shower glass is less expensive than a custom-made shower panel, and a frameless screen with a length of more than 2000 mm will cost more. You will have to cut the glass if your shower wall and floor are sloped, which will also cost you more.